Sorry for the inactivity guys.
But I've been quite busy lately, and I wasn't able to write anything in this blog.
Expect some more blogginess in the near future, let's say tomorrow or something?
(Chikane time = next week)
maandag 25 april 2011
woensdag 23 maart 2011
Last one alive, lock the door!
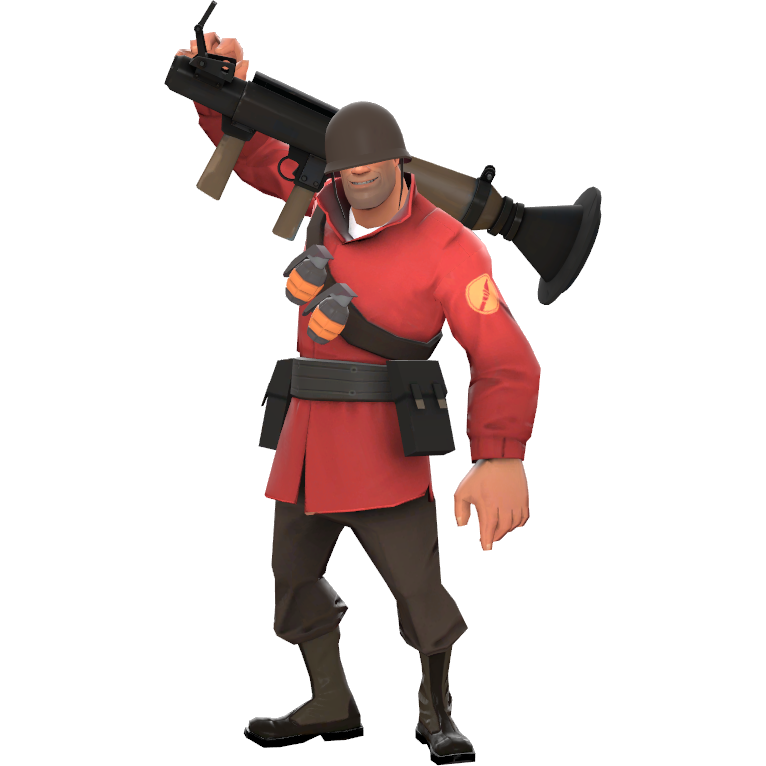 Ohshi- the Soldier...
This guy's a true powerhouse!
Some people think this guy is overpower because of the massive damage he can do, but that's not true.
Since those people don't know the Soldier's weaknesses.
As a Soldier you're both really well in offence and defense, but you should really focus on offence, since that's where he shines.
You need to know how to utilise the Soldiers strength and need to know his weaknesses.
A Soldier's primary objective should be to push the team forward and defend Medics.
The Soldier should mainly focus on:
- Pushing forward.
- Dissable Sentry Nests.
- Cause massacre.
- Get to the frontline and keep it under control.
What a Soldier should NEVER do on his own is:
- Trying to take out a Sentry nest without a partner/Medic.
- Run up against groups of 5 or more people.
- Mindlessly shooting everywhere.
Now that we've focussed on the Soldier's objectives, let's take a close look at the Soldier itself.
Pros:
- The Soldier is the most powerfull class in the game being able to take out an entire team by himself if the odds are with him.
- The Soldier has the second most health having 200 Health Units.
- The Soldier is able to Rocket-Jump to get to places other classes can't.
Cons:
- The Soldier is one of the slowest classes in game and will probably lose to a Scout if he's good at utilising his speed.
- The Soldier can't be away from Medics/Health- or Ammopacks for a long time, since his ammo is fairly limitted and he usually takes quite a few hits.
For the Soldier it's wise to be around Medics a lot since that will make you even more usefull, but this is obviously not required.
You can deal a lot of damage, but if you do you'll probably be the main target for your enemy.
Basicly you should know when to attack but more importantly, know when to fall back, this is what splits a decent Soldier from a good or even pro Soldier.
If you know you won't make something, don't do it, but head towards health and ammo, since you'll have the upperhand if he follows you there.
Having the element of surprise is something that's nice for the soldier but not required, but it's certainly a good idea to use this against Pyros since they have their compression blast you'll have to deal with.
Now, the weapons.
First off all, let's talk about the primary weapons.
The Soldier has three primary weapons: The Rocket Launcher, the Direct Hit and the Blackbox (and 4 if you count the Rocket Jumper but I'll cover that later).
These weapons also have the most devastating crits in the game, being able to deal up to 338 damage!
Most of these have their good and bad sides, and you'll probably fall in love with one of these quite fast and do not want to switch anymore, which is obviously possible since everyone has his favorite weapons.
Just make sure this weapon is ALWAYS loaded and you are ALWAYS wielding it if you are moving into a new area!
The Rocket Launcher is the standard and "ok" Rocket Launcher, if you don't want any nifty stuff this is your Launcher.
It has 24 ammo (4 clipped, 20 carried) and has a base damage of 90.
You need to utilise this weapon's splash range, since it's more usefull then just throwing rockets everywhere hoping to hit something.
Next is the Direct Hit.
This weapon is the strongest out of all, and that's no surprise since this weapon doesn't have splash damage, you need to aim with your rockets, which will only do a decent amount of damage if they hit.
They also do mini-crits if you hit an enemy in mid-air
There's not really a lot to say about this thing other then it turning the Soldier into a Sniper.
Finally there's the Black Box, a lot of people say this thing is overpowered, which I think is sad.
The gimmick with this is that it will do the same damage as the regular Rocket Launcher, and gives +15 Health units for each rocket that hits.
For the cost of one clipped rocket, making it only 3.
With this weapon you should truly focus on splash damage since that's what this weapon's best at.
The fact that this thing isn't overpowered though, is in the fact that you need to reload constantly, and since the Soldier cannot afford to miss rockets a lot this thing can be a pain if you miss.
Now let's talk about the Rocket-Jump.
With a Rocket-Jump you can skip parts of maps by utilising both height, disstance and speed.
To preform a Rocket-Jump, you need to look down, jump and fire a rocket.
If you crouch while jumping, you will go even higher, and to go further you should try to make the explosion happen as soon as you jump.
To practice this the Rocket-Jumper is pretty handy, it will do no damage, will make damage on you be double but has double the ammo, making it the perfect weapon to train your rocket jumps.
So that pretty much covers the primary weapons, out of all I'd say the Rocket Launcher and the Black Box are the best, if you use them well that is, and if you are accurate, use the Direct Hit.
Let's move on to the secondary weapons: The Shotgun, The Buff Banner, The Battalion's Backup, The Concheror and the Gunboats.
First of all is the standard Shotgun, which is a fairly decent weapon, and just like the Scout, the Soldier's only Lethal secondary weapon.
I'd say only use this if you are out of ammo, or to finish enemies off.
Next up is the Buff Banner.
After dealing 600(!) damage, your "rage" meter will be full and you'll be able to preform the buff, with this buff you'll deal 100% mini-crits for 10 seconds, and not only you will, but so will nearby teammates.
Be wary though, since you will be the primary target during this time, since killing you will end the buff.
Then there is the Battalion's Backup.
This is exactly the same as the buff banner but it's the defensive counterpart, it takes 175 damage to fill.
During the buff you will be immune to crits and will have +35% resistance to damage.
Next up, there's the Concheror.
This weapon is more a weapon to use on your own then to use with your team.
It takes 1133 damage to be dealt or 333 damage taken to be fully charged, because of this massive time to charge, you do NOT want to be killed while it's charged.
Since it's buff is great.
You will heal both you and your teammates for 20% of their health for 10 seconds.
The fact that charging this bloody thing takes so long keeps it ballanced.
And lastly, there's the Gunboats.
This thing just lowers self damage with rockets for 60%.
That's all there's to this, nothing else really.
Now, the melee weapons, the Soldier has 5.
They are: The Shovel/Pan, the Paintrain, the Equalizer and then Half-Zatoichi.
First of all there's the basic weapons which are the Shovel and the Pan (promotional item from Left 4 Dead 2)
These both deal 65 damage each.
Next up is the Paintrain.
This thing is purely situational.
Since this thing will give the Soldier the ability to capture points twice as fast as normal, but it raises his bullet vulnerability by 10%
Then there's the Equalizer.
This thing is a monster, seriously.
The lower your health is, the more damage you'll do and the faster you'll go.
With 1 Health Unit left, you'l l do 133 damage!
And his speed will be 60% higher, going faster then a Medic and almost faster then a Scout!
In my opinion you should ALWAYS wear this weapon, since you cannot go wrong with this.
You do a ton of damage, you can escape very easily and you will just over be more usefull with this.
Lastly there's the Half-Zatoichi.
This thing is kinda weird.
If you kill an enemy with it, you'll be fully healed.
But as a cost, once you've drawn the weapon you can't put it back before you make a kill.
This sounds overpowered, but if enemies see you using this weapon, they will backoff and you will be basicly dead.
Also note, a single with with this weapons on someone else who's wielding it will kill the enemy in one hit.
In other words, if you see someone else holding this weapon, go after him and kill him in one shot to heal yourself.
That end's the weapons I can talk about.
A few Combos I've thought to be helpfull as Soldier are:
- Black Box, Concheror, Half-Zatoichi (Or Equalizer).
- Direct Hit, Gunboats, Equalizer.
- Rocket Launcher, Buff Banner, Equalizer.
With this second entry I hope you've learned something and will now both be able to use the soldier but also utilise it's weaknesses, untill next time.
See ya
vrijdag 18 maart 2011
Ya can't hit what ain't dere!
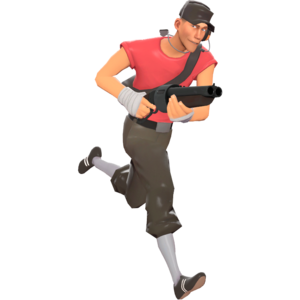
This is one of those classes that can be either the strongest of the team, or the weakest, deppending on how well you master him.
As a Scout you must know your strengths and weaknesses like no other.
A Scout should also know his primary objective on the battlefield and shouldn't take unnecesairy risks if they can be avoided easily.
The Scout should mainly focus on:
- Capturing the inteligence and capture points.
- Weakening enemies.
- Cause madness and confusion.
- Covering the frontline as fast as possible on the start of a round.
What a scout should NEVER do on his own is:
- Pursuit groups of enemies larger then 2.
- Try to take down sentry nests by himself.
- Mindlessly running around.
Now that we've focussed on the Scouts objectives, let's take a close look at the Scout itself.
Pros:
- First of all, the Scout is the fastest class in the game and can easily outrun most classes with some exceptions in certain situations.
- Second of all, the Scout can use a double jump, which can help him not only to jump the furthest, but also the highest, thus making the Scout the most mobile class out of all.
- The Scout obtains a 2 times faster caption rate on capture points, allowing him to capture areas twice as fast then any other class.
Cons:
- The Scout has only 125 Health units, making it one of the weakest classes in the game in health, which can even be taken down to 110 Health units if you're wielding the Sandman.
- The Scout is pretty bad at long range because of his weapons' bullet spread, he's most effective at close range, which is quite risky.
As a Scout your basic strategy would be: Attack, do damage, fall back when the enemy notices you, restore your health and come back to finish your target off before he can restore his health and repeat the process.
As long as the enemy doesn't see you coming this strategy is fairly solid and will work in most cases.
Just make sure you fall back before they can kill you.
Now let's talk about weapons shall we?
First off all, let's talk about the primary weapons.
The Scout has three primary weapons: The Scattergun, the Force-A-Nature and the Shortstop.
All of them are quite good in combat but have significant ups and downs.
The Scattergun is a pretty well ballanced primary weapon.
It has a nice clip, enough ammo and does a fair amount of damage, you really can't go wrong with this one.
Next is the Force-A-Nature.
This weapon is fairly strong yet has two mayor downsides.
It's the strongest out of the three but only has 2 shots, which is why you should make every shot count.
Not only that, but it also reloads very slow, so watch out with this thing.
Also something to note is that the Force-A-Nature has knockback, with this you can propel both yourself and targets a fair distance away, you can use this to your advantage to escape or use a Force-Jump.
Finally there's the Shortstop, this thing really can be a beast at short range, but is otherwise not that great.
It has a faster firing speed then the other guns and has a fast reload time, ontop of that, it does twice the damage per pellet compared to the other guns, in other words, this is a great weapon to use at close range.
Most people say it's overpowered, but there's one thing they often don't realise which is a big drawback for this weapon, which is the fact that it shares it's ammo with the pistol, meaning that using a pistol with this thing is virually useless.
So I'd say that if you're going to use this weapon it'd be wise to stick to a bonk or something to not waste your secondary slot.
So that pretty much covers the primary weapons, out of all I'd say the Scattergun and the Shortstop are the best, if you use them well that is.
Let's move on to the secondary weapons: The pistol/Lugermorph, Bonk! Atomic Punch, Crit-a-cola and the Mad milk.
First of all is the standard pistol (or the Lugermorph if you have Poker night at the inventory), which is a fairly good weapon, and the Scout's only Lethal secondary weapon.
It has a nice firing rate and is pretty accurate.
But I'd only use this if you use the Scattergun or the Force-A-Nature since that would be the most logical choice, since you only switch over if you're out of ammo or don't want to reload.
And since the reload time is so fast there's no point switching to this if you have the Shortstop.
Next up is the Bonk.
This is more of an invincibility powerup then a weapon, but meh.
The Bonk is truely handy to use if you're low on health and need to get to a medkit or you must bypass a sentry nest.
Bonk gives you a 6 second invincibility time and has to recharge for about 24 seconds, so be carefull when using this, and make sure you know you can passby certain points within those 6 seconds.
Next up is the Crit-a-cola.
This is the offensive counter part of the Bonk, which gives you mini-crits for 6 seconds and also takes about 24 seconds to recharge.
This may sound nice and all, especially since a Scout can be truly devastating with crits.
But there's a downside, which is that you will take mini-crits as well, and this is a mayor drawback since you are already on low health, but do make sure you know what you are doing when using this, since you will be both lethal and mortal at the same time.
Finally, the Mad milk this weapon can be truly good in almost any situation, basicly you throw it at enemies and every time that enemy get's damage you'll obtain 75% of the damage they took.
Which can obviously be a life saviour in almost any situation.
This weapon can also be used to null a Spy's cloak and extinguishes fire's on both you and your team mates.
Also the Mad milk has a 24 second recharge meter.
Now that we've covered all the primary and secondary weapons, let's talk about the melee weapons.
The Scout has 7 melee weapons, all of which are pretty decent but most are pretty gimmicky.
They are: The bat, the Sandman, the Holy Markerel, the Candy-Cane, the Boston Basher, the Sun-on-a-Stick and the Fan O' War.
First of all there's the basic bat's the Normal Bat, and the Holy-Markerel, which do 35 damage each which is pretty decent.
Next up is the Sandman.
This is like the bat and the markerel, but it also has a ball that comes with it.
You can throw this ball by pressing the Alt-Fire key, this will stun players and can even kill them on low health.
The stun can range from 1 to 8 seconds, the ball can be picked up afterwards or can recharge for 15 seconds.
This weapons will lower the Scouts health with 15 Health units, leaving him with only 110, which is this weapons only drawback.
The Candy-Cane is a very good tool to help Scout endure for a longer time, since it droppes a small health pak on each kill if you have this weapon equiped, it's downside however, is that you'll have 25% less explosive resistance which will make almost every explosive hit a 1-hit KO.
Ohhh, the Boston Basher, this thing is LETHAL!
And if I say lethal I mean for you.
This weapon is the same as the bat, but it has another effect, when you hit an enemy, he will suffer from a 5 second bleeding effect, which does 8 damage each hit for a total of 40.
However, if you miss, it will hurt yourself, stacking both the hit of the bat and the bleeding effect for a grand total of 75 damage to yourself.
This weapon is risky to use, but if you manage to land hit it can be quite good.
Also something to note is that you're able to Boston-Jump while using this, which can help you reach even high with your jumps.
Next up, is the Sun-on-a-Stick.
This weapons effect is simple, it will do twice the damage against burning players, in exchange for -15% damage done, so if you stick with a pyro while using this you'll be fine.
Lastly, there's the Fan O' War.
This weapon is a monster if you use it well enough.
Basicly, it does -90% damage, but if you hit someone every hit after that will be a minicrit.
So see it as a Crit-a-cola mixed with the bat.
Just make sure you switch to your primary weapon after you land the first hit.
That end's the weapons I can talk about.
A few Combos I've thought to be helpfull as Scout are:
- Shortstop, Mad milk and Candy Cane.
- Force-A-Nature, Bonk! and Boston Basher.
- Scattergun, Mad milk and Fan O' War.
I hope this first entry will be of use for some people and untill next time,
See ya
donderdag 17 maart 2011
I don't think they saw that one comin'!
So yeah here's gonna be my first blogging project thing, throughout the course of this and next week I'll be covering the different classes of Tf2 with some tips I found to be usefull for them and some detailed strategies I have thought off.
Hope you'll enjoy.
Hope you'll enjoy.
What'ya know?
Wow, I seriously didn't think this would ever happen...
But I made, a blog.
Yeah...
I have some ideas what I'll do with this, but as far as I know it will be about random crap I annoy myself with, real life, hobbys or whatever the fuck I can come up with.
So yeah, let's see how this goes, ey?
But I made, a blog.
Yeah...
I have some ideas what I'll do with this, but as far as I know it will be about random crap I annoy myself with, real life, hobbys or whatever the fuck I can come up with.
So yeah, let's see how this goes, ey?
Abonneren op:
Posts (Atom)